Recently, I’ve discovered the sacred practice and art of the pour over. While I’m not proud of my taste in coffee, I am proud that I’ve found ways to take shortcuts so that it can be made without any unnecessary appliances in about 90 seconds. There are 5 main things to keep in mind here: the filter, the brewing method, the beans, the milk, and the pour.
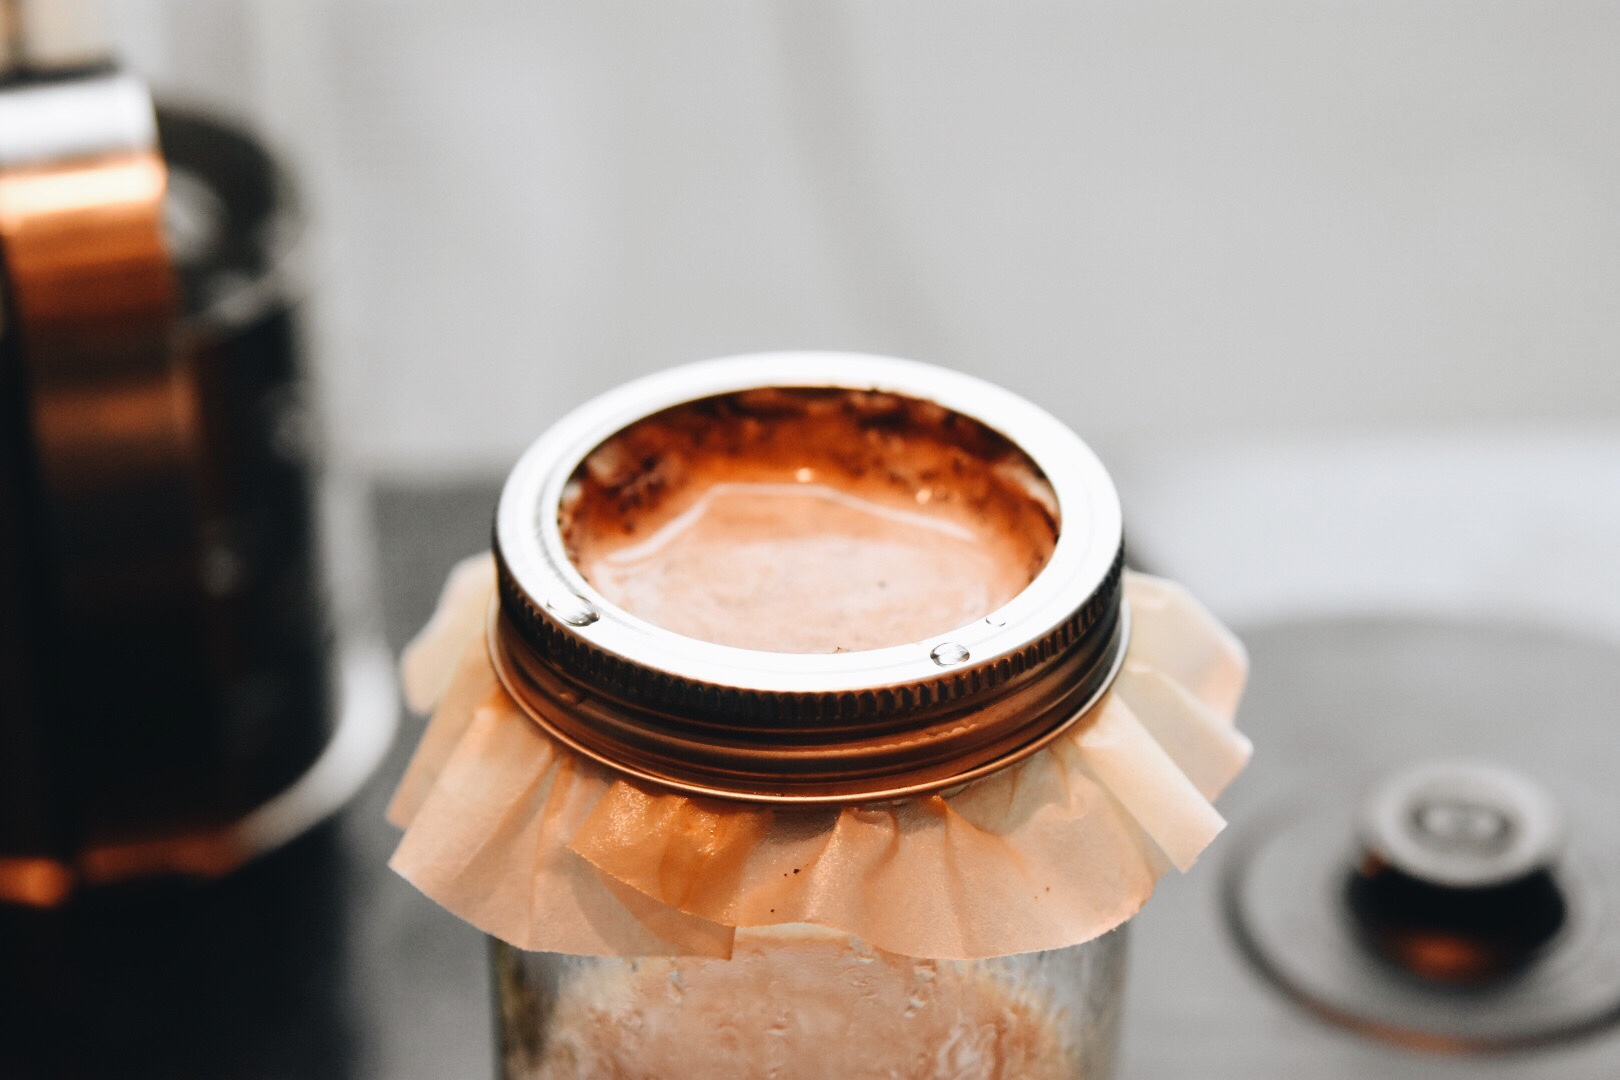
The filter: The type of filter you use can be very important: the 2 main types are flat bottom filter, or a V-filter. I use a flat-bottom, but it’s more like a U-bottom since I do it in a mason jar. The shape is not conducive to allowing water to flow equally over all beans and unlock the secret flavors but you won’t notice a difference anyway.
The brewing method: You can brew the coffee by using pressure (like an aeropress), or relying on gravity to turn your hot water into coffee as you pour it slowly over the grounds. I use gravity because it doesn’t require special equipment or dishes I need to clean later. I think it is called a pour over because you pour water over the grounds. Super easy!
The beans: I tried 5 different types of coffee, and they were mostly the same. I inherited some old coffee, which I used during the first few weeks of my journey. Once my housemates exposed me to different types of coffee, I could taste the difference. It was subtle, but there nonetheless. Starbucks pre-ground Columbia is not that different from Columbia from a fresh-roasted, small-batch pre-ground local roaster, in my unrefined opinion. We did a smell test of all 8 coffees that were in the house and I only could correctly identify two of them. I was just as happy during week one of bad coffee as I was week four and beginning to taste the subtle differences between bad and good coffee AND good coffee is significantly more expensive. So my advice here is if you can’t taste the difference, don’t ever try good coffee because you might notice a difference and won’t enjoy your bad coffee as much. Real coffee lovers will tell you that you can taste a difference between fresh ground versus pre-ground beans. I borrowed a grinder from my housemate to test this theory and couldn’t tell the difference.
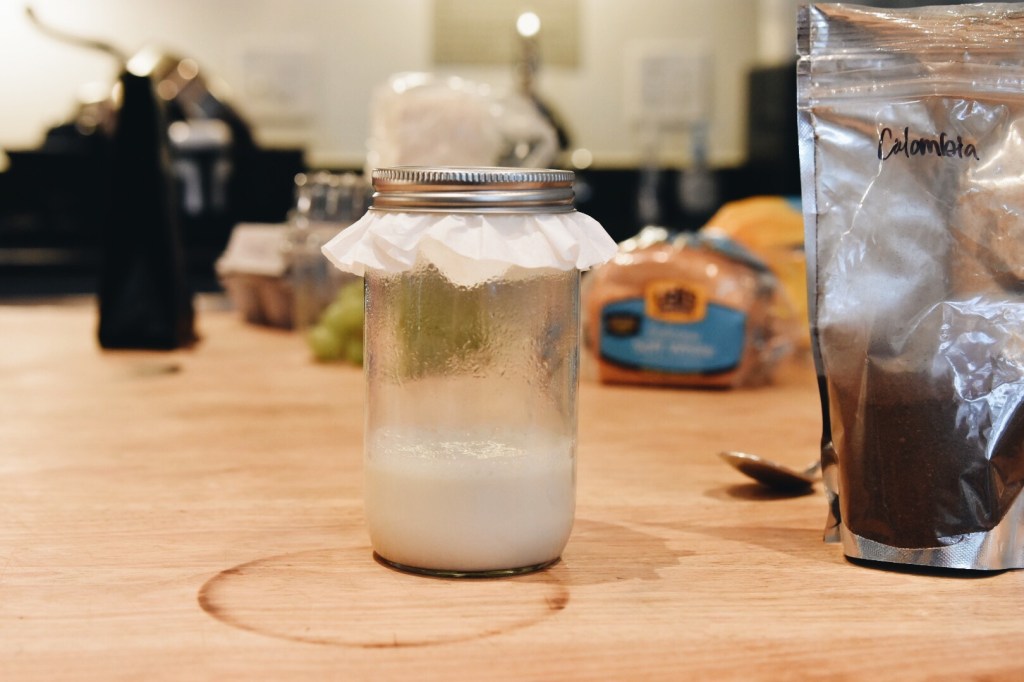
The milk: Once again, true coffee lovers will tell you that a real cappuccino has ⅓ steamed (cow) milk, ⅓ foam, and ⅓ espresso. Because I don’t have a milk steamer, foamer, or the ability to digest actual milk, I break the rules a bit here. I’ve tried to shake the milk until half of it is foamy but this is so much work, and really not worth it. My favorite milk is oatmilk, and Trader Joe’s has the best one, which is thick and creamy but also slightly sweet. Oatly and Whole Foods are also good options. I found Califia (oat flavor pretty strong, too thick, and grainy), Silk (kind of slimy and but otherwise average), and Pacific Foods oat milk to work just fine. The only brand I really didn’t like was Planet Oat, which I found too grainy and the flavor was strong: almost nutty or oily. Also, producing a gallon of oatmilk takes less than 50 gallons of water, whereas a gallon of almond milk requires 920 gallons of water and a gallon of cow milk needs 2,000 gallons of water. Once I have milk, I put ½ cup in a mason jar and microwave it until it’s warm.
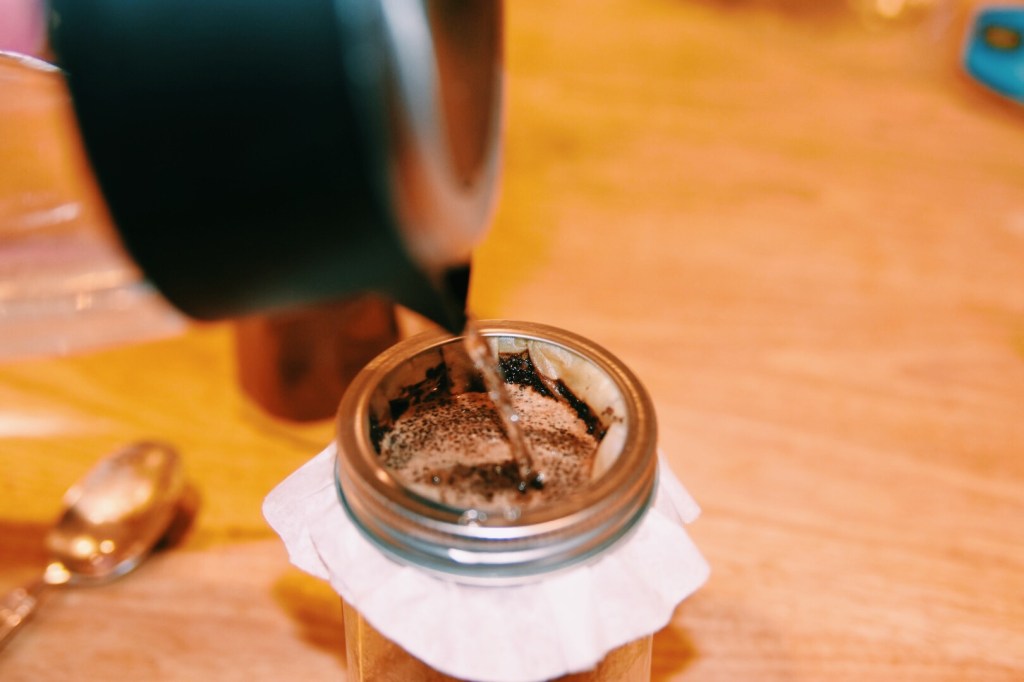
The pour: I then take my mason jar with warm milk and put about 2 tbsp in a coffee filter in the outer lid of the mason jar. Once again, true coffee lovers will tell you that the pour is very important, because the speed, amount, and temperature will ensure that the subtle tasting notes have time to emerge and be brewed into your coffee. As an amateur, I really couldn’t tell you the difference between coffee brewed over the course of 30 seconds and 2 pours and a few stirs versus coffee brewed over the course of 60 seconds with 4 pours and no stirs. They also tell you to get a gooseneck hot pot to better control the speed and precise location your water is landing over the grounds in order to get all of the notes and make sure each patch of grounds is equally watered, but honestly you can do it just fine with a normal hot pot. You may see bubbles when you first pour the water over the coffee, which is from CO2 being released, but if you are like me you won’t see any, probably because your pre-ground, hand-me-down coffee is stale or maybe you’re bad at pouring it. I usually do 3 small pours, where I let the water trickle down and give my grounds a stir before pouring again. The stir is a no-no if you are serious about coffee, but I do it to make sure all the grounds are used because I can’t always control the shape of the stream of water. I pour about ½ cup of water in all, because I prefer a 1:1 ratio of coffee:milk, and like the coffee pretty strong. Here are some expert tips if you’re trying to spend more than 90 seconds making coffee.

I’m very proud of this method because it is so easy and quick but tastes almost as good as if you were to do everything right. It’s also worlds better than instant coffee, and using a moderately high quality bean will really enhance the experience. Once you make your pour over, try to finish it within an hour because it tastes more bitter the longer you let it sit out.
Let me know how your mason jar pour overs turn out!
